In this article, I will demonstrate the best way to perform backtesting in Metatrader 4 in a simple and easy-to-understand way.
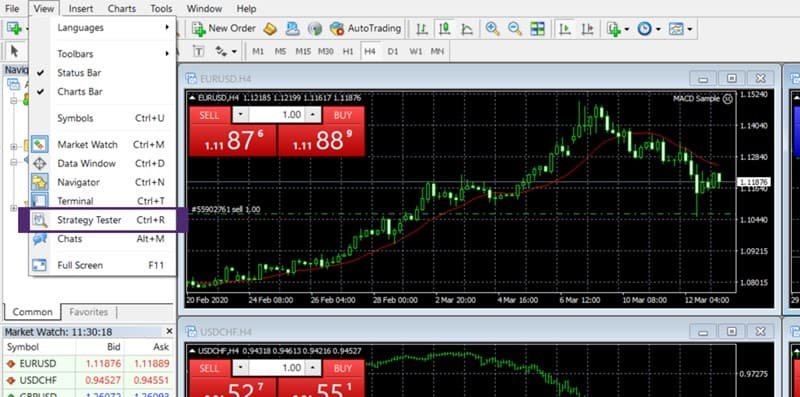
Traders who use Metatrader may have used the Strategy Tester to test an automatic system (Expert Advisor), however, the results obtained in this test are not always the most reliable.
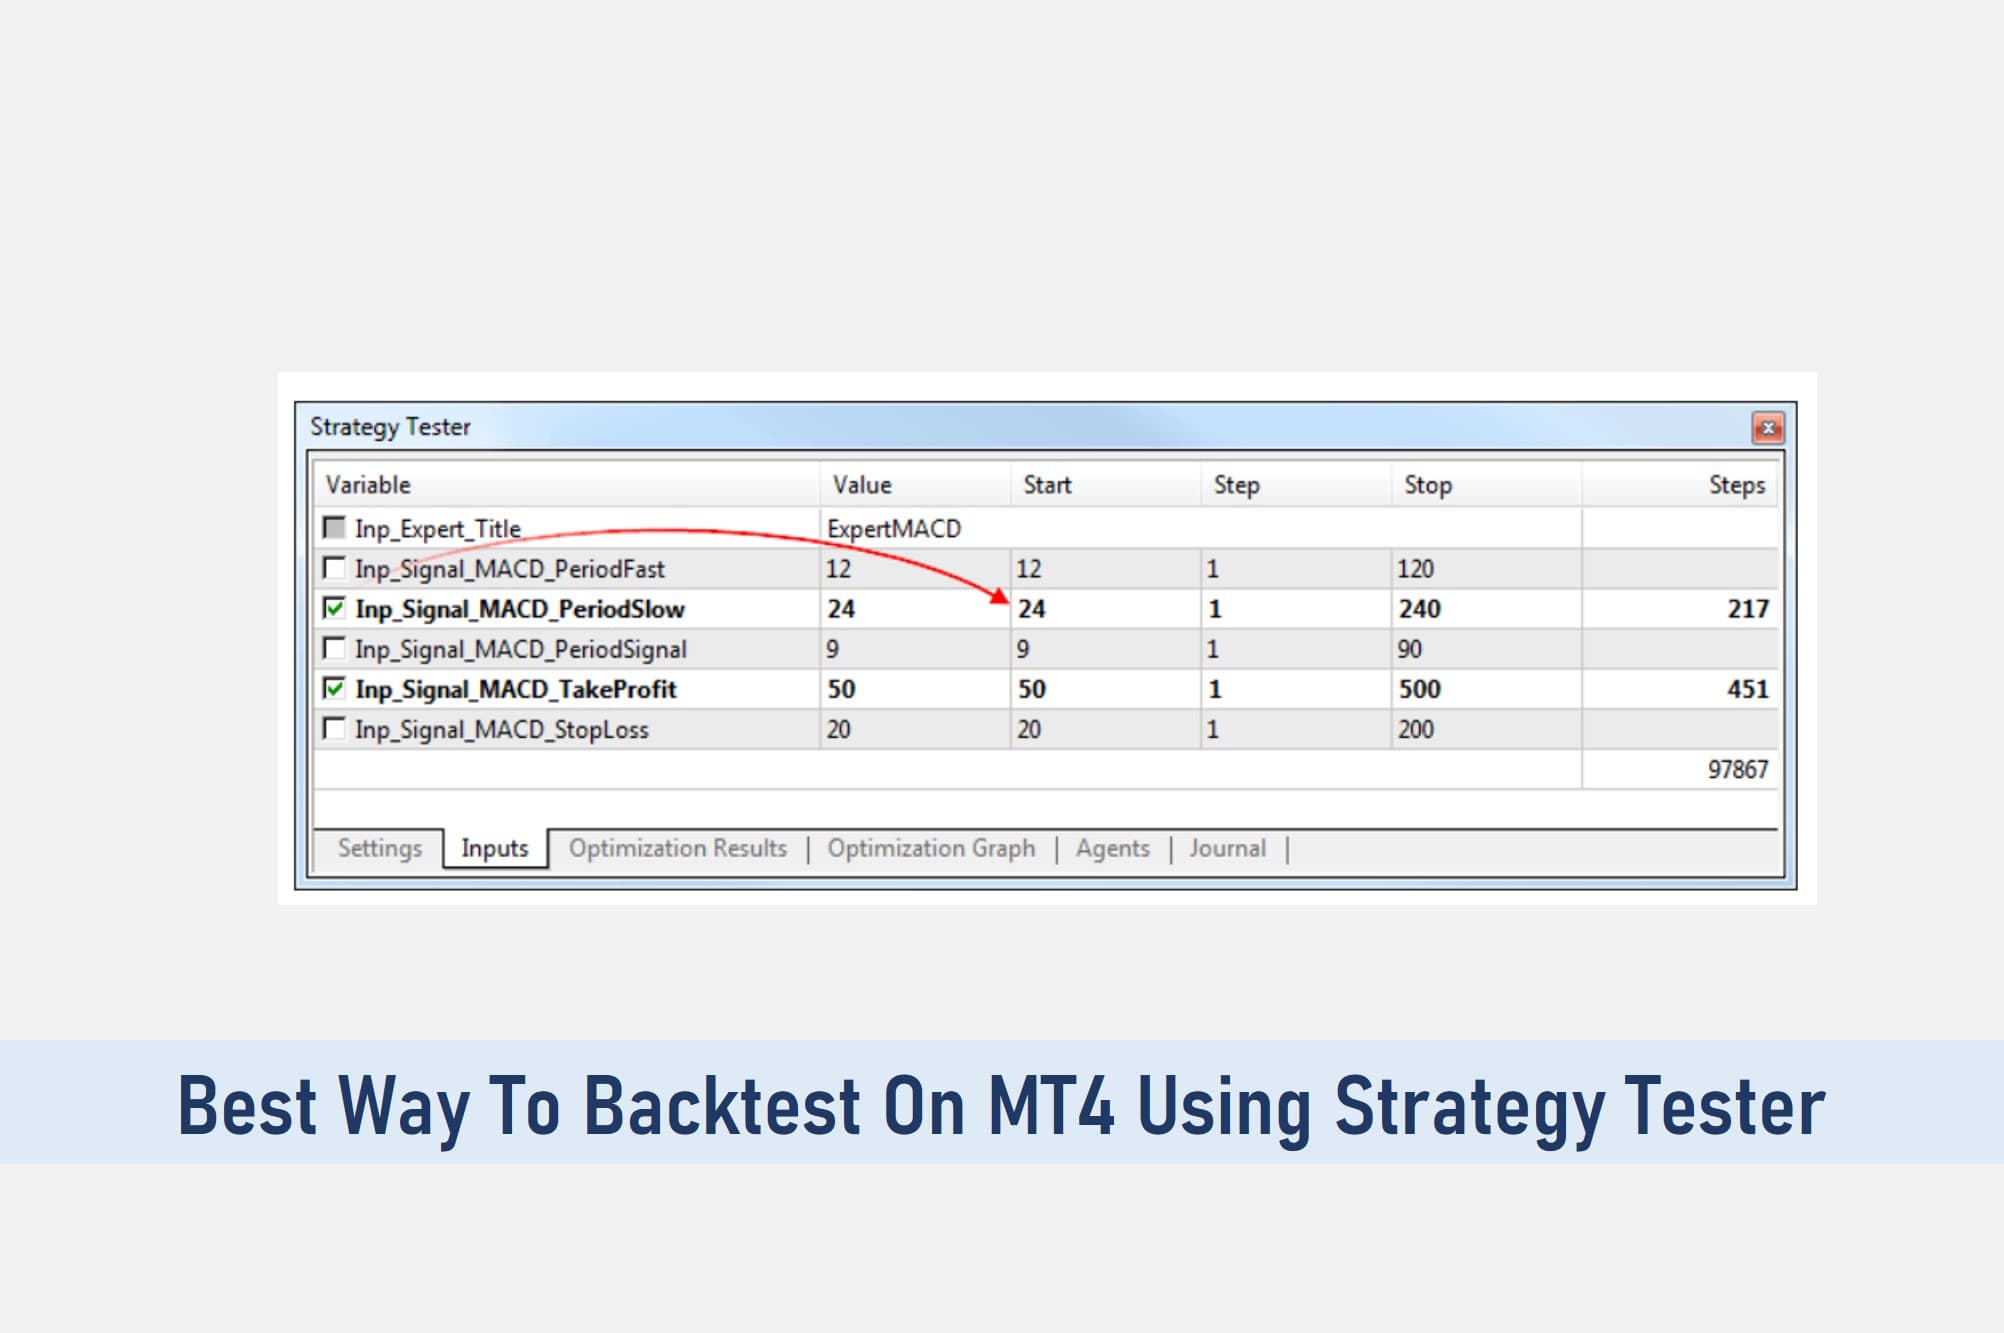
The best parameter to determine the quality of the results of the Expert Advisors tests in Metatrader is the modeling quality whose value you can see in the final report of the Strategy Tester in the upper right corner.
The value of the quality of the backtesting must be above 90% so that it can be considered as a quality backtesting, the optimum being 99% (never or rarely reaching 100%).
SEE ALSO: Advantages and Disadvantages of Using Forex Robots
What is Backtesting?
Backtesting is a technical method of analyzing historical data of currency pairs or any other financial instrument to give insight on how it will perform in the future.
Generally, 3-5 years of historical data is used as a base or minimum to backtest a strategy, security, or market.
The Metatrader backtesting is carried out using the historical data of all timeframes lower than the timeframe in which you are going to perform the test.
A large part of the quality of the backtesting is determined by the availability of said data for the period chosen for the backtesting.
Thus, if I am going to backtest an EA for the period January 1, 2010, and February 1, 2020, in 1-hour charts, the Strategy Tester will try to use the historical prices of the opening, closing, maximum, and minimum of the candles.
The Strategy Tester will display 60, 30, 15, 5, and 1-minute charts. Losing quality in the backtesting results when the data of the different timeframes is not available.
Modeling Using Historical Data of M1 Candles
Now I will explain how to achieve a quality modeling of at least 90% using the historical data of M1 candles.
The first thing to do is obtain the M1 chart history from your broker. There are several ways to do this:
• Collect the M1 data in real-time
You will have to have an M1 chart open and wait for time to pass and the data to accumulate minute by minute, day after day until you consider that you have enough data for your backtesting. This is undoubtedly the least viable route.
• Download the M1 data using side-scrolling on the graph
Using this method, you cannot download data for more than two months, maybe three, for a new installation of Metatrader, so it is not adapted to the needs of the vast majority of us.
• Download M1 data through the history center
Through the Metatrader history center, you can download the timeframe data you want but with several problems. The amount of data may be limited and not all brokers have this function enabled.
If your broker has this function disabled, the data is downloaded from metaquotes and may be out of sync with your broker’s time zone. Therefore, this is not the best option either, but it may be worth it if your broker offers it.
• Download M1 data from your broker’s database externally
This is the best option. Ask your broker how and where you can access the download of the archives with the historical prices of M1 candles.
So let’s proceed with the steps to perform a quality backtesting:
1. Download & Install a Metatrader apart from the one you normally use, for this you simply specify a different installation folder when installing Metatrader. Do not open any demo or real account. If you open it close it.
2. Go to the folder Program Files> Metatrader4> history> Server and delete all the named files of a currency pair, do not delete symbols.sel nisymgroups.raw. Also, delete all the files from the downloads folder in metatrader4> history> downloads
3. Download the data using the option in point 4 of those mentioned above or using the option in point 3 if your broker offers this download appropriately. The downloaded data will be saved in the program files> Metatrader> history> downloads folder.
4. Open Metatrader. The window to open a demo will appear, close this window. The graph windows should not show anything as you deleted the data in step two.
5. Go to Tools> Options and click on the graphics tab. For the maximum in the field «Max. bars in history “and in” Max. bars on the graph ». To put the maximum, do not select the options but write in the box as many 9 as the program allows you. Click OK.
6. Now go to Tools> History Center. Scroll until you find the currency pair whose data you have downloaded and select that pair. When selecting the pair, no data will appear since you deleted them in step 2. Click the Import button. A window will open in which you must select the downloaded file. Once the file is loaded, click OK and OK again.
7. By not having any account open there will mean no connection with any server. Go to File> Open Offline and select the currency pair you have been working with throughout the process in the option where M1 appears.
8. Now you must run the “period converter” script on the M1 chart to transfer the data to higher temporalities (this script is included in Metatrader, see under the list of Expert Advisors and Custom Indicators).
You must run the script once for each temporality that you want to build and it is necessary to have the data of the temporality in which you are going to perform the test and in all the lower temporalities.
Thus, if you are going to perform the test on H1 graphics, you must run the period converter script 4 times: for 5, 15, 30, and 60 minutes.
Every time you run the script you must enter the number of minutes for the conversion in the script parameters: 5, 15, 30, 60, 240, etc.
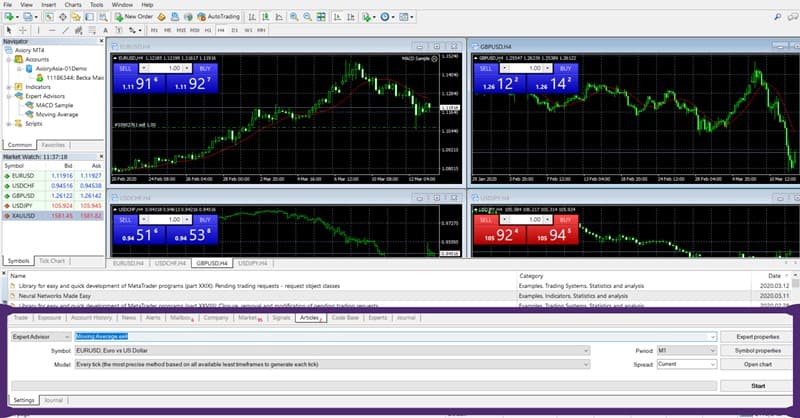
9. After performing step 8 go to File> Open Offline and you will be able to open all the charts of the currency pair and timeframes for which you have done step 8. Open the chart in which you are going to perform the backtesting, add the Expert Advisor that goes try, and Happy Backtesting.

Read More