How Delegating Solana Works
Delegating a token is simply the ability of the holder of the network’s token to earn a piece of the block’s reward by adding their token to the staked tokens on another person’s node. Delegation is a proof of stake (PoS) term used side by side with Staking.
Solana runs on the proof of stake consensus mechanism where you can delegate your holdings to a staking pool operator and have it staked on your behalf.
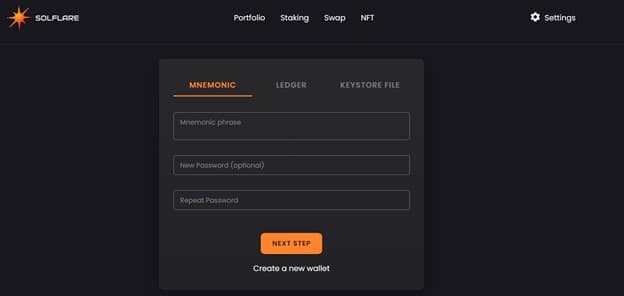
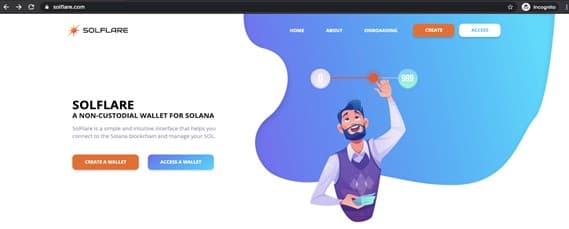
Delegating Solana is straightforward and I will illustrate how to delegate with the Solflare wallet when it is linked with hardware storage like Ledger. Note that Solflare is a hot wallet (desktop wallet).
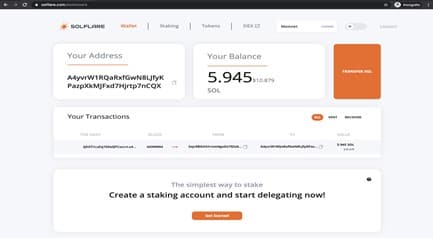
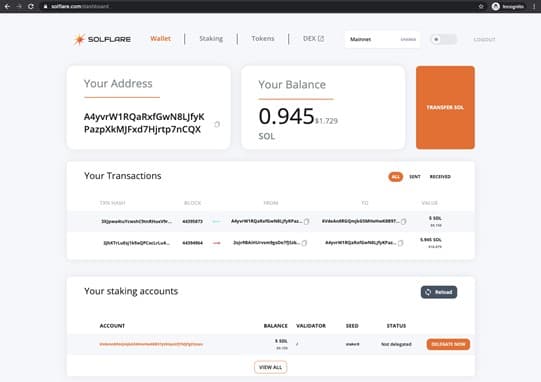
The first thing you will need to do is to create an account on Solflare and fund your wallet.
After you have successfully funded your Wallet Account, it is time to create a Stake Account.
To do so, you can either click ‘Stake Solana’ in the Portfolio Menu or head over to the ‘Staking Menu’ or click ‘Start staking’.
Key Takeaways
• Solana fees are $0.00025 per transaction, but they fluctuate over time. The fees are set by the competition for block-space, which increases when the traffic on the blockchain increases.
• By using the Staking tab you can see the full list of validators you can stake to and all other information such as their total stake amount, the number of delegators (Stakers), skipped blocks, visit the validators’ websites.
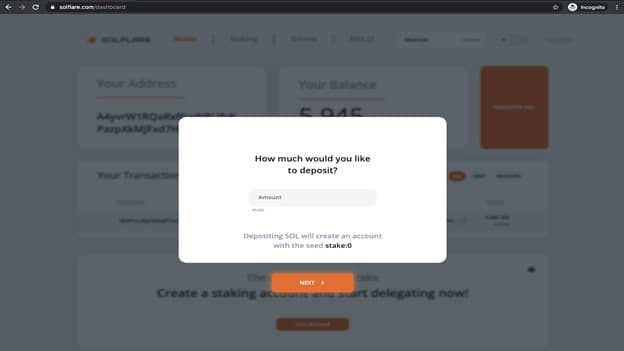
In the pop-up menu, choose the amount you want to stake. The amount chosen will be transferred into your Stake Account.
Make sure to leave some $SOL in your Wallet Account to pay for transaction fees. Leaving 0.1-0.5 SOL in your Wallet Account should get you a long way.
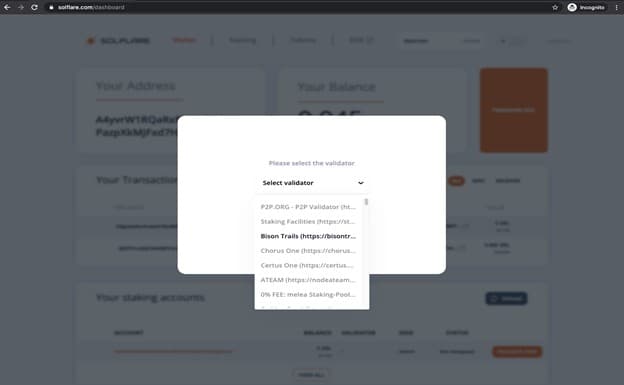
Choose a Solana Validator and Stake
Then choose a validator from the drop-down menu. You can also look for specific validators via their name. Once you have chosen a validator, you are presented with some statistics or transaction history about them.
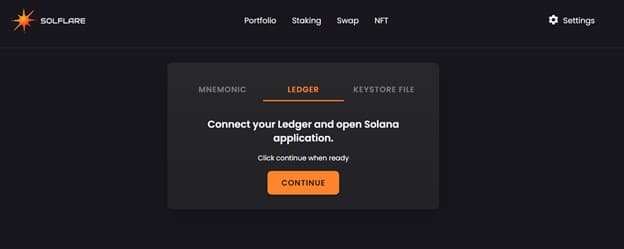
Click ‘Stake’ to continue to the next step. Confirm the transaction on your Ledger device to finalize the process (Ensure your Leger device is already connected). If you don’t have a ledger wallet, you can get one from the Ledger Store.
The next thing is that you will now find your Stake Accounts listed in the Solflare Staking Menu.
Please note that your delegated SOL will start earning rewards once the Warmup Period has concluded. This usually takes one epoch (2–3 days). Until this is the case, you will see your Stake Account with an “Activating” status. You can always check the progress of the current epoch on solanabeach.io
Now it is important to note that as a token-holder, have the power to increase the overall security and hence the overall value of the network. This can be achieved through enhancing decentralization by delegating to more than one validator.
SEE ALSO: How to Choose a Validator when Staking with Ledger
For you to do this successfully, you need to create more than one Stake Account and spread your funds across these different Stake Accounts.
Repeat the above process for every Stake Account you want to create and delegate. Click the ‘+ Create account’ button in the Staking menu to start the process.
Solana fees are $0.00025 per transaction and change with the dictates of the blockchain. The fees are set by the competition for block-space, which increases when the traffic on the blockchain increases.
Compared to Ethereum, Solana has 60 thousand times lower fees. This is because of the high scalability of Solana compared to Ethereum. As Solana keeps scaling better, the fees will decrease even more in the future.
The Solana Foundation has announced that a total of 489 million SOL tokens will be released in circulation. At the moment, about 270 million of these have already entered the market.
Trezor Wallet Supports Solana
Trezor is one of those wallets that support Solana, created by Satoshi Labs in 2012. The company is responsible for several well-known Bitcoin projects including Slush Pool (a Bitcoin mining pool), CoinMap (map of establishments that accept Bitcoin), and, of course, Trezor.
At the moment, Trezor offers two devices offering (mostly) the same coin support:
Trezor offers support to an array of coins from a multitude of different standards and protocols, including ERC20, Bitcoin, and others.
Trezor hardware wallets are unique in that they are the only hardware wallet offering native support to all ERC20 tokens.
Since Solana natively supports all ERC20 tokens, there is no need for the integration of MyEtherWallet or MyCryptoWallet into the Trezor wallet.
Even though this feature may sound insignificant to some, it adds even more security than other hardware wallets can and prevents using a third-party integration to secure your tokens.
As a bit of background: ERC20 tokens are cryptocurrencies made on the Ethereum protocol. To be ERC20 compliant, you have to follow the ERC20 protocol standards.
Sending any amount of ERC20 tokens to another wallet requires the sender to have enough Ether in the Wallet to cover the transaction fees. The transaction fee depends on the complexity of the transaction. This transaction fee is called “Gas”.
Besides the ERC20 tokens, Trezor offers support to all major cryptocurrencies, including Bitcoin Cash, Solana, etc.
SEE ALSO: 7 Best Exchanges that Supports Solana
Ledger Nano X Hardware Wallet + SolFlare Wallet
This is a great way to safely hold your Solana cryptocurrency in the hardware wallet, stake it to earn rewards, and use it on DApps built on the Solana blockchain. To access a ledger wallet, you can get one from the Ledger Store.
Setting Ledger Nano X hardware wallet (Nano S will work also) and SolFlare web wallet is very easy.
Below is a step-by-step guide on how to use the ledger wallet to delegate Solana.
Step One: Connect Ledger to SolFlare and Fund
- Connect your Ledger, unlock it, and navigate to the Solana app within the Ledger manager.
2. Navigate to solflare.com and select “Create a Wallet”.
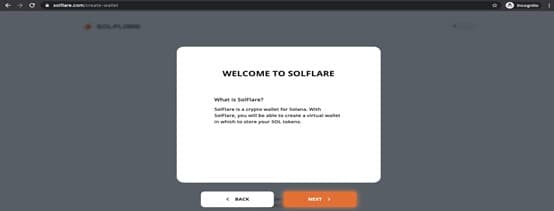
3. Select “Next” several times and then “Get Started” to navigate through the tutorial.

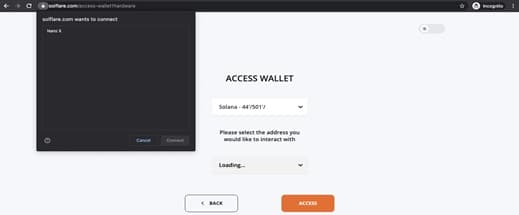
4. Select “Using Ledger Nano S” and click “Access”.
SEE ALSO: 6 Best Places to Stake Solana
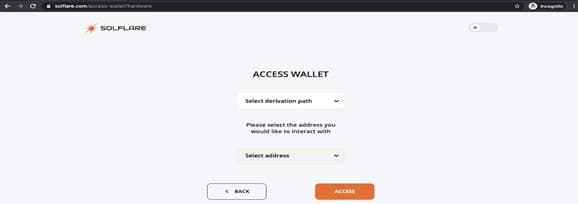
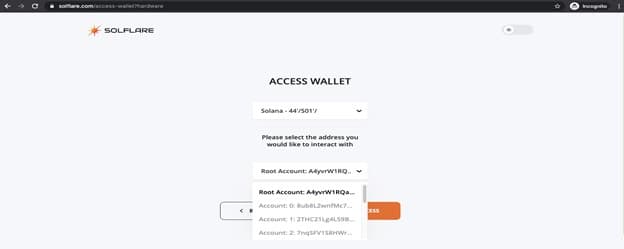
5. Click the “Select derivation path drop-down and select the first option, “Solana – 44’/501’/”
6. Select your ledger device from the pop-up screen. If the UI gives you any errors, ensure your ledger is unlocked and has the Solana app open.
7. Select your Root Account and click Access.
8. Review the prompt on your Ledger. It should show your Pubkey (public address) on the screen. Confirm your address is correct.
9. Send SOL to your new Ledger address.
Step Two: Delegate to Bison Trails
- Select “Get Started”
2. Enter how many SOLs you would like to delegate. Please leave at least 1 SOL on your account to pay for future transaction fees. Click “Next”.
If you receive an error message, ensure your Ledger is unlocked and has the Solana app open.
3. Confirm the creation of a new stake account for the correct amount of SOL.
Select “Delegate Now”
- Select the Bison Trails validator from the dropdown menu and click “Next”
- Review the delegation transaction prompt on your Ledger. Confirm that the “Vote Account” matches the Bison Trails vote account address: “beefKGBWeSpHzYBHZXwp5So7wdQGX6mu4ZHCsH3uTar” Approve the transaction.
Now, you are delegating to the Bison Trails validator.
Solana as of now cannot be added to Metamask, you will need to set up a Solana wallet before transferring it to metamask.
Frequently Asked Questions and Answers (FAQ)
1. How much can you make Staking Solana?
Currently, SOL offers a 7% ROI, while you can stake up to 100,000 coins over between 24 hours and 12 months.
If you staked the maximum amount of tokens for a year, you’d earn 7,000 coins with a total value of $237,138.52 (at the real-time price point of $33.97).
2. How do you make money on Solana?
To earn staking rewards on Solana, users need to delegate their SOL stake to a validator, which is responsible for validating and approving transactions on the blockchain.
The more transactions a validator approves, the more SOL rewards they earn. The validator then distributes rewards to users delegating them to them.
3. How many Validators does Solana have?
There are 608 validators as of the time writing. According to Solana itself, there are currently 608 validators helping secure the Solana Network and 47 decentralized applications (or “dApps”) powered by Solana.
4. How do I send Solana to SolFlare?
Once you have some tokens at your wallet address, you can send them to any other wallet address or an exchange deposit address by clicking “Transfer SOL” in the upper-right corner. Enter the recipient address and the amount of SOL to transfer and click “Submit”.
SEE ALSO: How to Qualify for a Solana Airdrop
Final Thoughts

Read More